How to Make Ghee (Indian Clarified Butter)
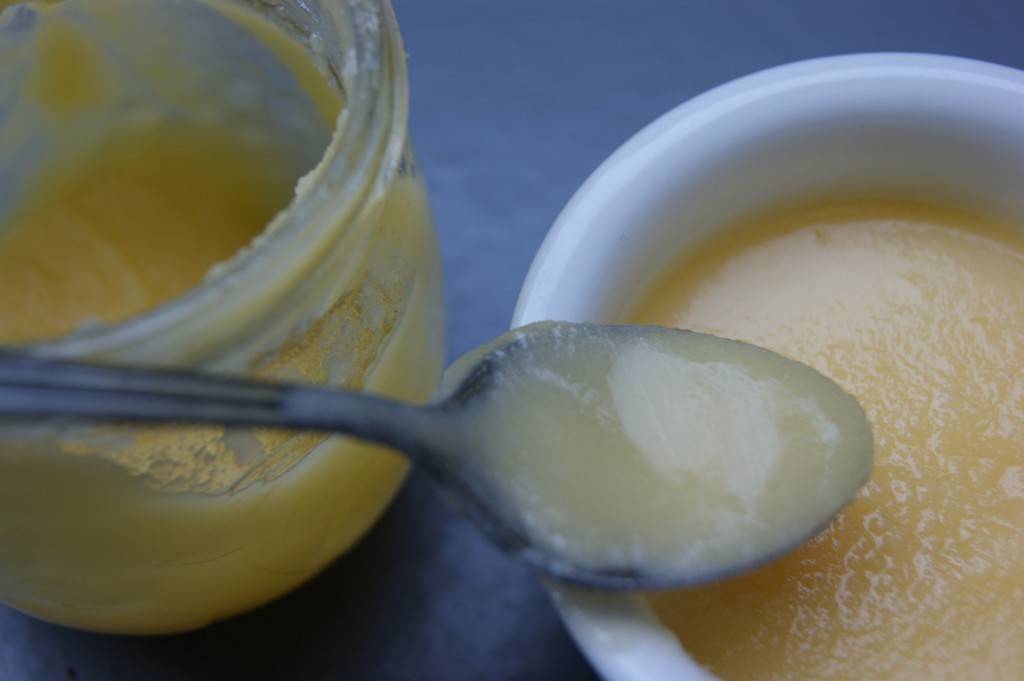
I make ghee in at least half of my cooking classes, and not just the Indian ones. But, although my cooking class students always get to taste the delicious results, they never get to see the process.
Honestly, I’m not a negligent culinary instructor – I just need the ghee right away in class. I don’t have time to wait a delicious half an hour while the butter caramelizes and gets beautifully nutty in the pan. So I make ghee before class and teach how to make it via elaborate descriptions of the process and the results, with a recipe to take home.
Also, my students get to gaze confusedly into a pot of caramelized milk solids or a cheesecloth covered with the same.
While I hope all my students are ghee experts by now, I worry that a significant number are still completely confused about it. So I thought it was time to give a little blog class on how to make ghee.
Ghee, for those who don’t already know, is a kitchen wunderkind in the form of caramelized clarified butter. It has a higher smoke point than butter, a better flavour than butter, keeps better, cooks better, all around better than butter. (Did I just say that? But I LOVE butter!)
Let’s get technical for a minute. Butter is only about 85% fat; the rest is made up of water and milk solids. When you cook with butter and it burns, you can blame that on the milk solids, which are sugary and don’t cope well with high temperatures. To turn butter into a superior (i.e. non-burning) cooking fat you need to get rid of the milk solids. To clarify butter, you evaporate the excess water and separate out the milk solids from the pure butterfat. Easily done by melting butter in a pot, simmering it gently for a few minutes to evaporate the water, setting it aside for a few minutes to let the milk settle below the pure fat, and finally scooping or pouring off the pure butterfat.
In India, cooks take this process one step further. After the milk solids have separated from the butterfat, the butter is NOT poured off and separated, but left on the heat until the milk solids (which are sugary, remember?) caramelize on the bottom of the pan, flavouring the butterfat with their sweet, toasty, nutty, butter-tart like aroma. After you strain out the caramelized milk solids, you are left with ghee, a golden exilir to make all your cooking dreams come true.
Also, ghee is lactose-free.
Seriously, if you want to get right into cooking, Indian cooking especially, you need to have ghee on hand. So here is how to make it.
GHEE
Yield: 1-1/2 to 1-2/3 cups
Start with one pound of fresh unsalted butter. Cut it into cubes and place them in a medium-sized pot with a heavy bottom.
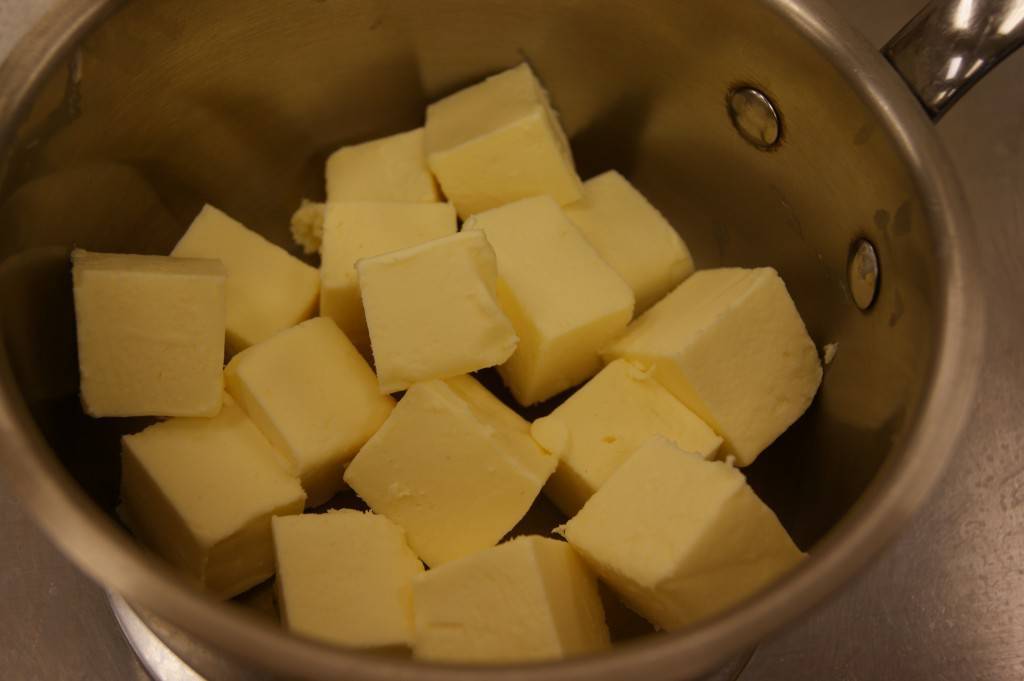
Place the pot on a stove element and turn to medium heat. Melt the butter. Turn the heat down to medium low. While you are making ghee, make sure the butter is at a very, very gentle simmer. Adjust the heat accordingly, depending on your own stove.
After a few minutes, the butter will look like this:
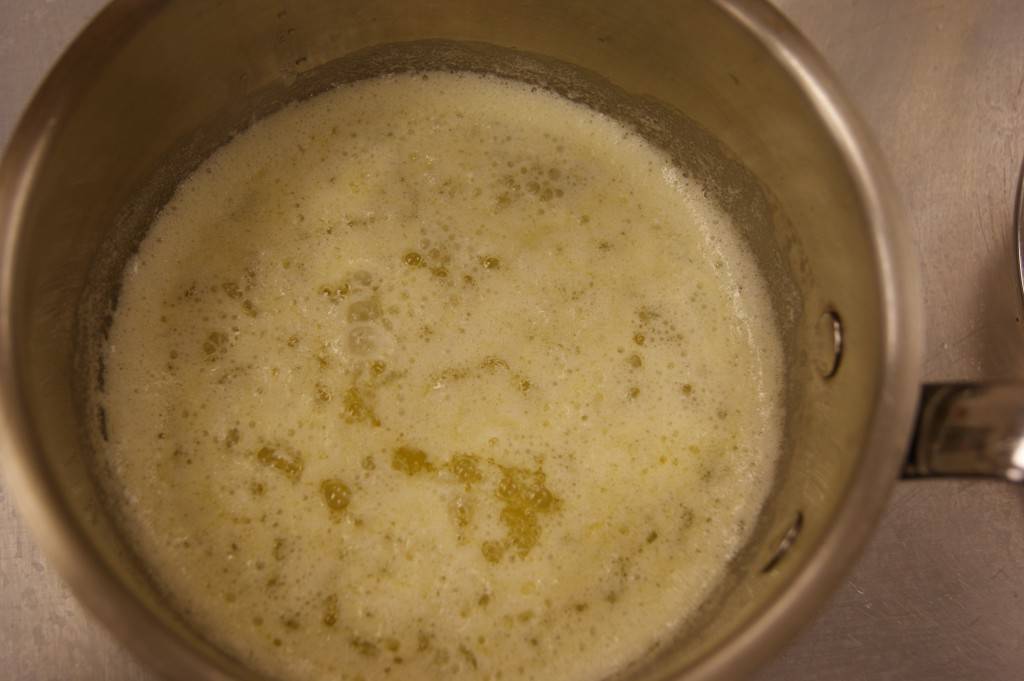
After about 10-13 minutes, the butter will look like this:
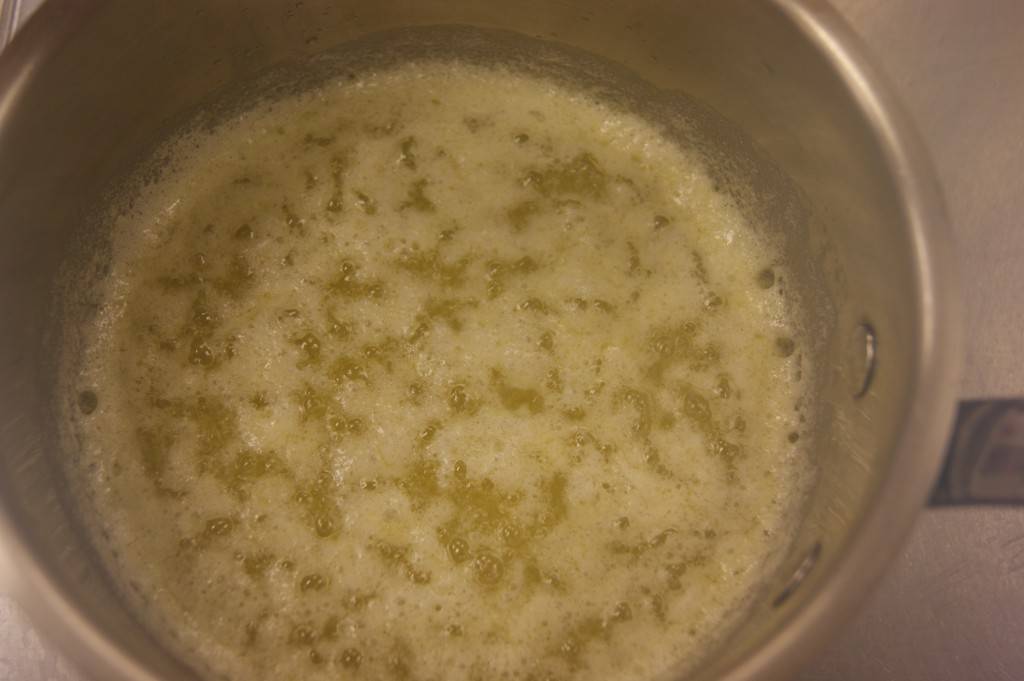
After about 20-25 minutes, the butter will look like this: (it’s very close to being ready! you should see some lightly caramelized milk solids on the bottom of the pan.
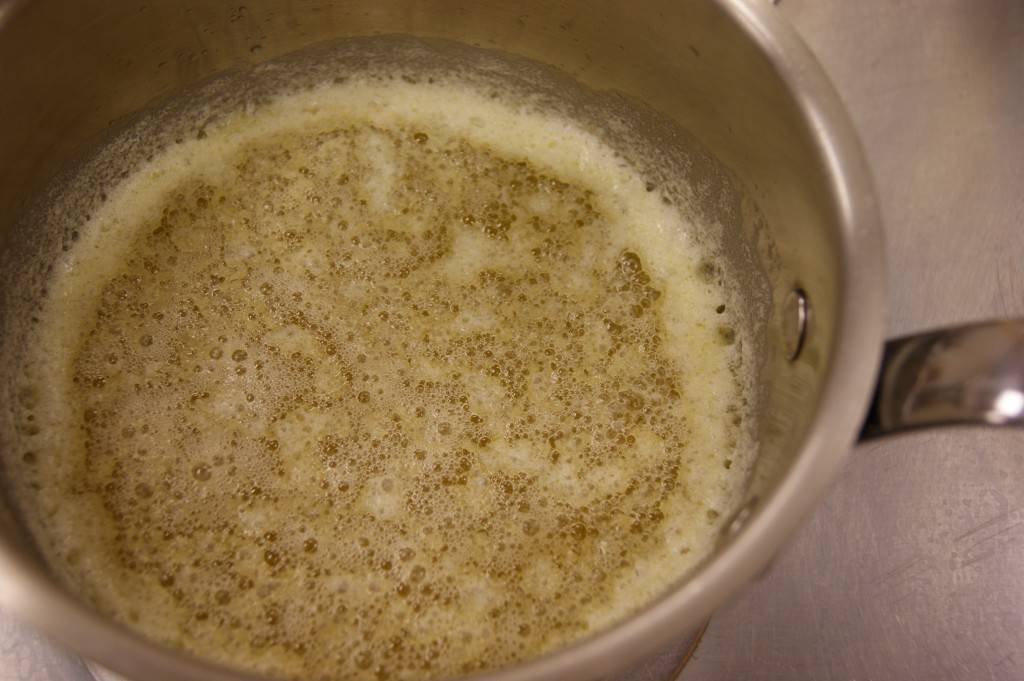
At this point, watch the butter very carefully. It can go from perfect to burnt in no time flat. This is what perfect caramelization looks like, in two pictures:
(Note – ghee can be a little less or a little more caramelized than this. Use your own taste as a guide. If your ghee gets away from you and gets quite dark, it is probably still useable. Only if the milk solids are completely black is the ghee ruined.)
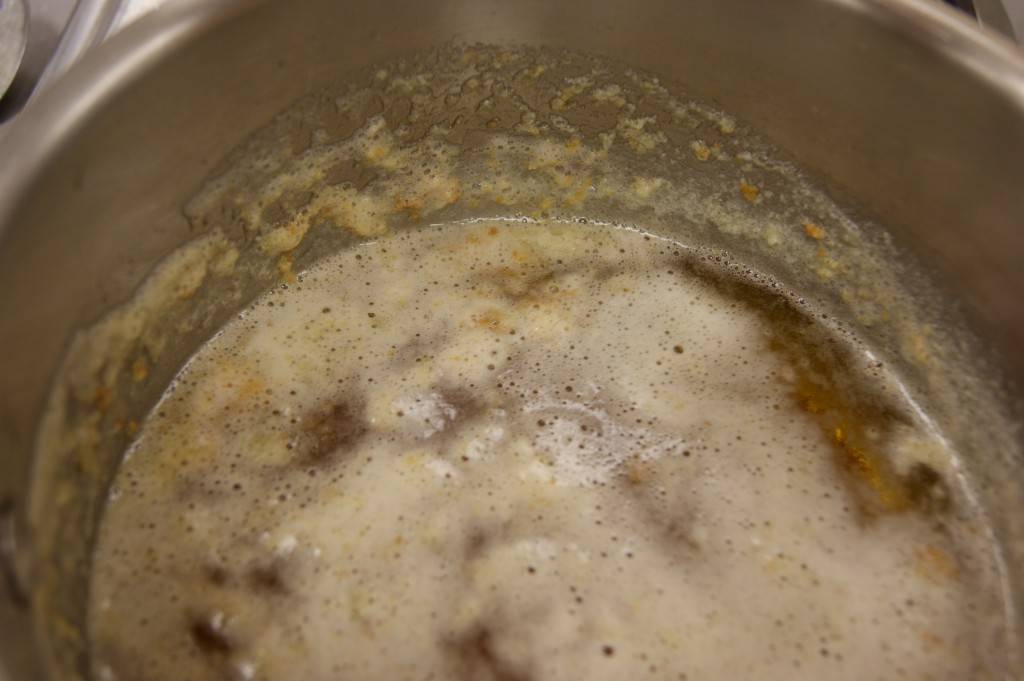 Side view
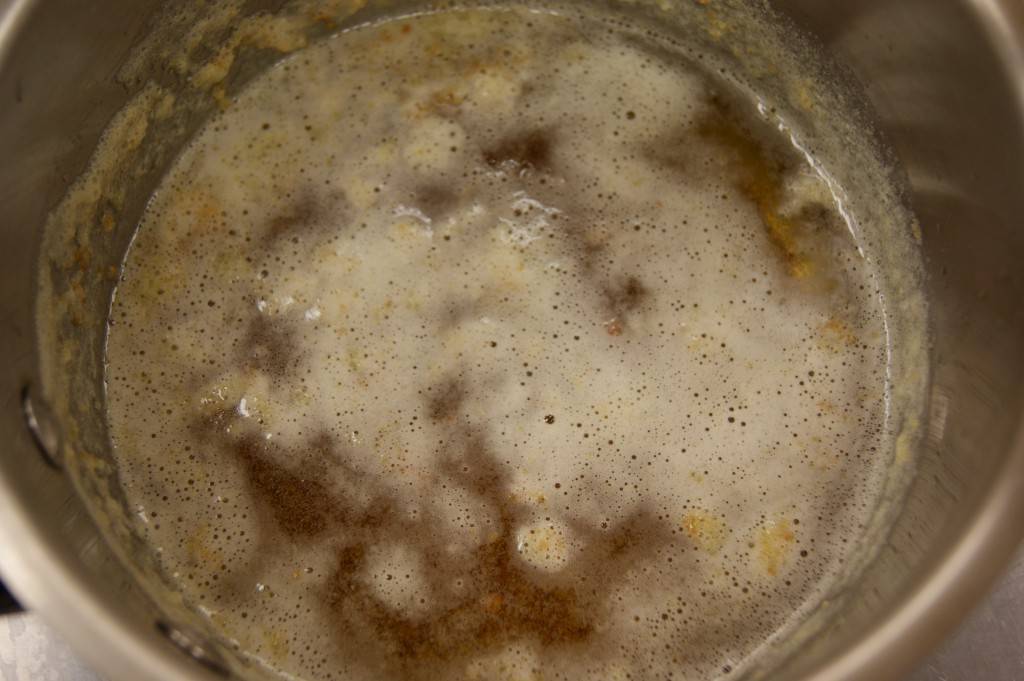
Top-down view
At some point during the process of waiting for the butter to ghee, you will set up a small strainer, lined with several layers of cheesecloth, suspended over a bowl or a large measuring cup.
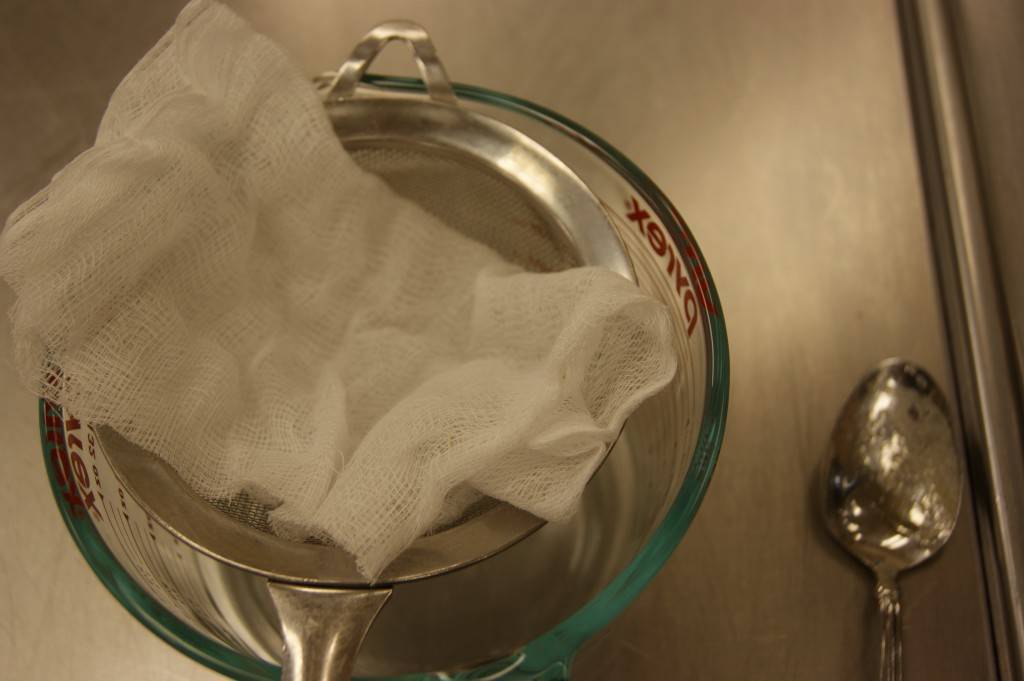
When it is ready, pour the ghee through this cheesecloth-lined strainer. This step, although fussy, is very very important. It’s tempting to imagine that you can leave the milk solids behind in the bottom of the pan and do away with the straining, but any bit that gets into your ghee (and believe me, some will get in if you don’t strain it) will make the ghee go bad very quickly.
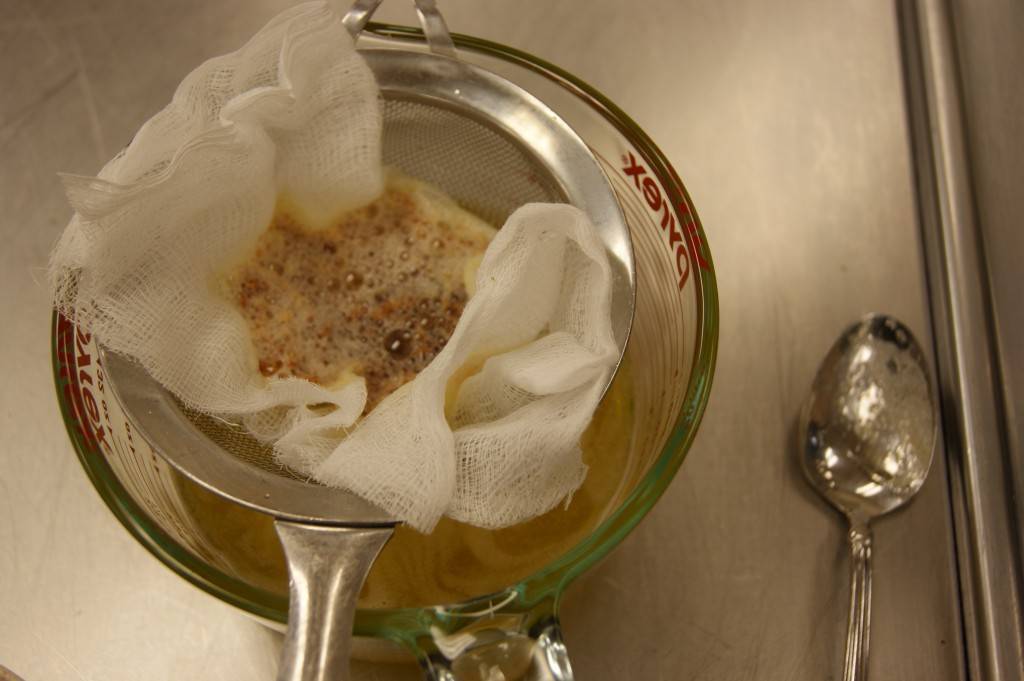
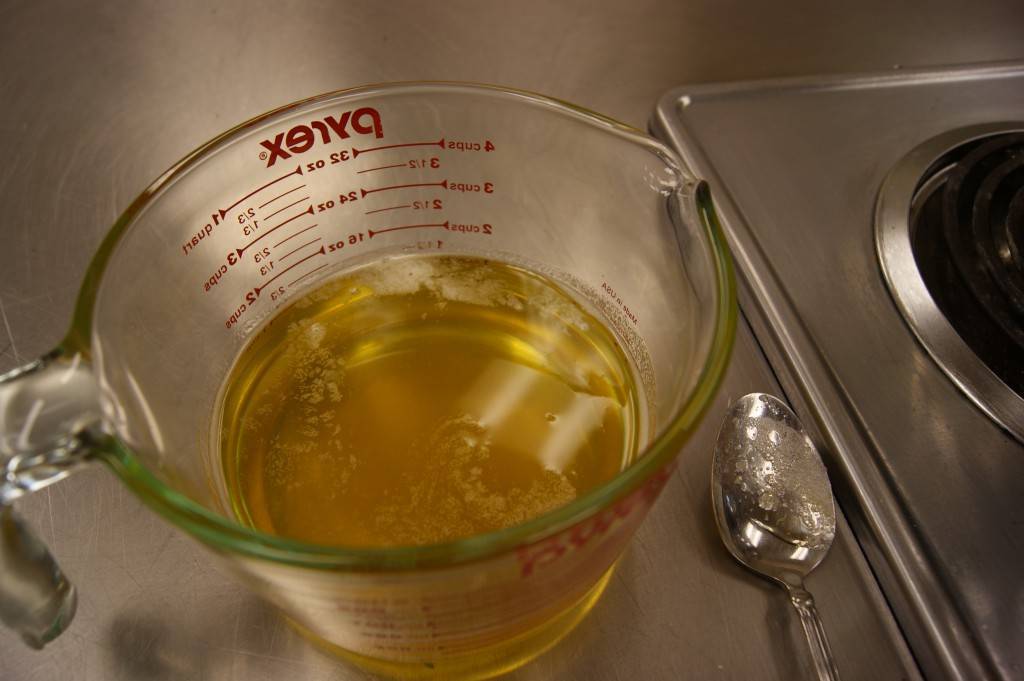
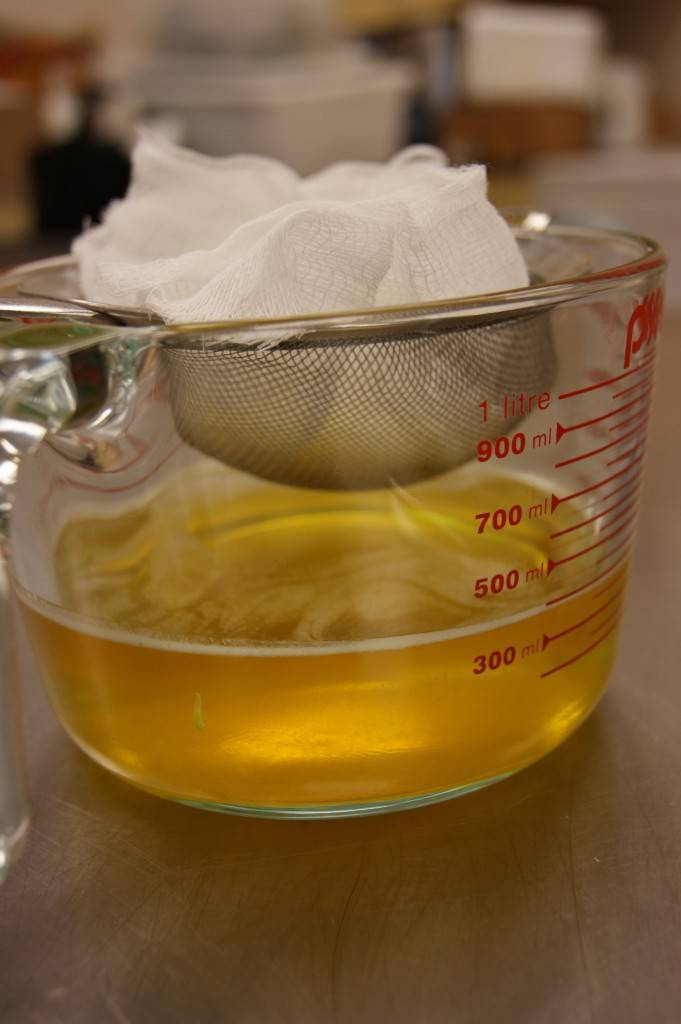
After straining, you will be left with this golden liquid of perfection (isn’t it so pretty?!):
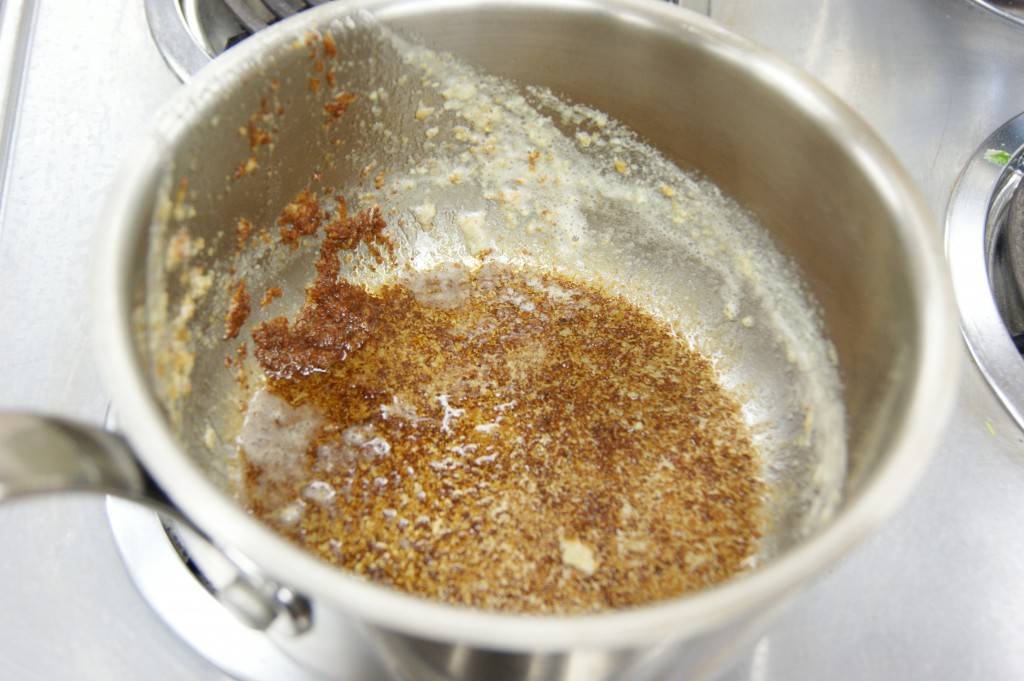
This is what the bottom of your pan will look like after you strain off the ghee. Don’t worry, the clean up is much easier than it looks. (As an aside, caramelized milk solids are actually very tasty. Try them spread on some bread.)
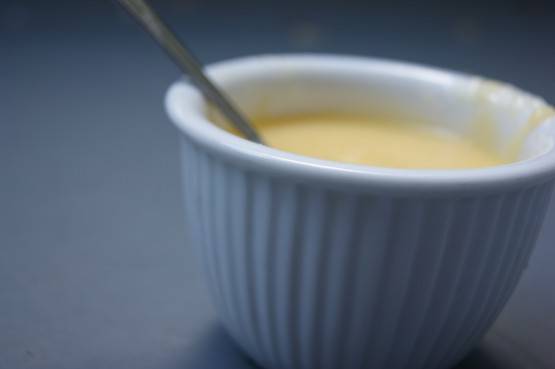
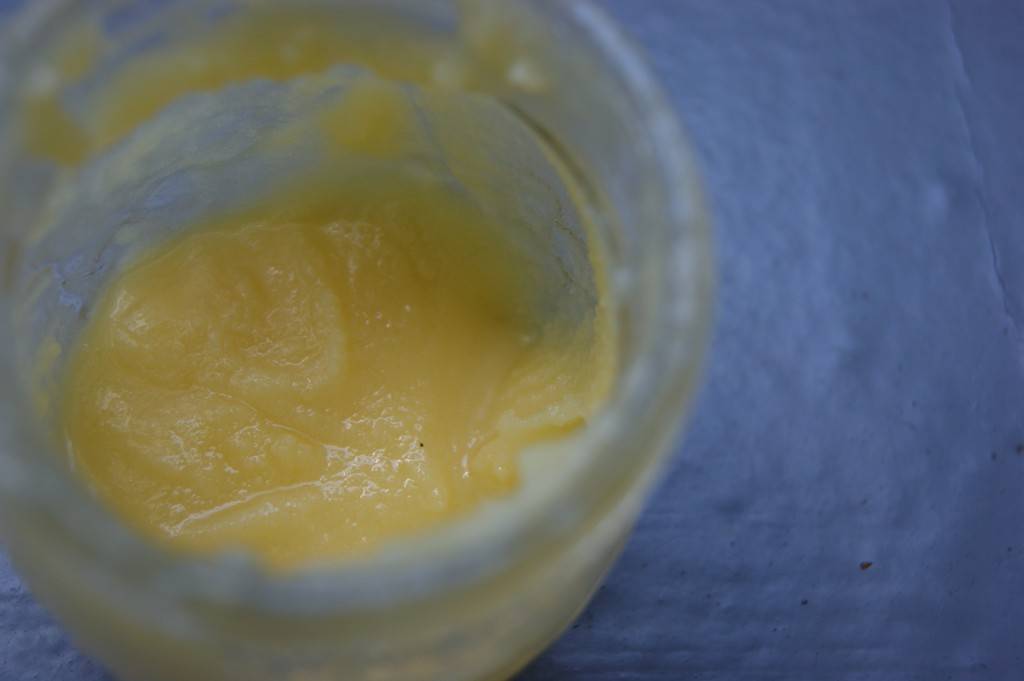
This is what the ghee looks like when it cools down. It is spoonable at room temperature, and very hard in the fridge. I usually store mine in a glass jar in the fridge, with some left out in a ramekin by the stove to use in cooking during the week. 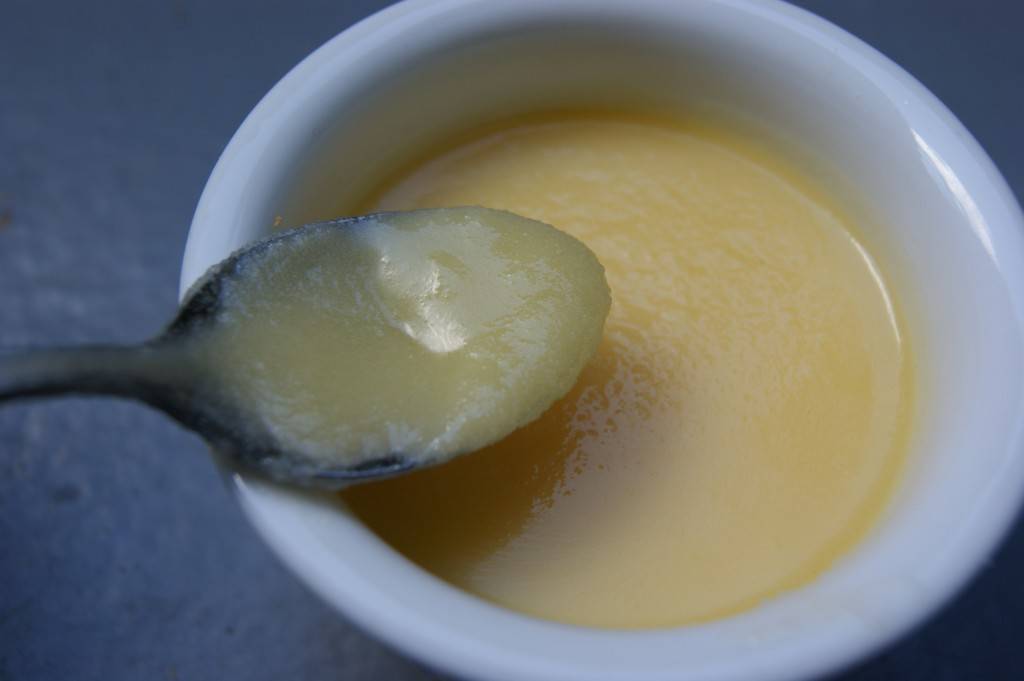
Ghee keeps at room temperature for at least a month, and keeps for a long time in the fridge (I’m tempted to say “indefinitely”, but the ghee never lasts that long around here – I use it up too quickly.)
Finally, what does a person do with ghee? Aside from using it to make delicious Indian food (think ghee-soaked naan, cauliflower simmered in spices and ghee, ghee-toasted almonds atop cardamom rice pudding), I use ghee for cooking vegetables, meats, fruits, desserts, everything. Ideas:
- Toss asparagus, or winter squash, or cauliflower, in ghee and roast in a hot oven to caramelized deliciousness.
- Fry your French toast and pancakes in ghee (seriously YUM).
- Saute your panko-crusted halibut or snapper in a generous amount of ghee (oh. my. god.).
- Put melted ghee in your banana bread or chocolate-zucchini cupcakes.
- Spread ghee on toast (watch out – you will eat toast like crazy after trying this!)
- Pan-fry chicken breast cutlets in ghee.
- Drizzle ghee on poached eggs or steamed rice or baked squash.
- Etc, etc, etc.
Thanks for this blog-class!! I’m definitely making me some ghee soon! :)
you’re welcome, Zorymar. I’m so glad you found this helpful.
Very useful post. I’m tempted to ask since I never tried it myself but just rely on what I buy ready made, what would the advantage of making it from scratch be over the store bought variety?
Hi Wizzy, I prefer to make my own ghee b/c it’s fresher, cheaper, I can caramelize it as much or as little as I like, I have the option to use cultured or organic butter, and it takes very little effort to make. It’s worthwhile to try making gheee at least once, to see if you may like it better. In order to make sure that your store-bought ghee is made from butter and not from vegetable shortening, look for the name “pure desi ghee” on the label.
Hi Heidi,
I took your class on Monday at Cook Culture. Thanks I really enjoyed it.
I made ghee last night and after 55 minutes on the stove top I did not get the browning of the milk solids. They did filter out but the liquid I poured was not the nice clear amber colour we worked with or that you have pictured on this web site. In fact the liquid was not clear and still showed a bit of white.
The butter was simmering during the process. I moved the foam to one side to make sure I had activity in the pot during the process.
I thinking two possibilities. The pot may have been too small of a surface area for 2 pounds of butter or it wanted more heat.
What is your opinion?
Thanks.
Peter Juergensen
Victoria
Hi Peter, I would say that your assessments are correct. A bigger pot and/or more heat would probably have helped. My instinct would be to start with a bigger pot first. BUT if you say that the liquid was still a bit milky, I would say that heat would have been an issue for sure. It sounds like there was still some water or milk that had not completely evaporated out of the butter. You can always start with a higher heat and reduce as it gets closer to browning. It’s important to evaporate all the liquid before the milk solids start to brown.
You sound like you have pretty well-clarified butter, if not ghee. It will still be delicious for cooking. Keep it in the fridge, since it might have a bit of milk left in it. I’m sure the next time you make ghee, it will work very well. Good luck!
Mmm ghee! I make butter fresh in my kitchenaid mixer and then instead of washing the remaining milk out of it, I just send it straight to a pot for ghee. It’s as fresh as it gets and so delicious. And making butter myself it only adds maybe 15 minutes to the process and I get buttermilk out of the deal :)
I use ghee in my diet and it really helps me to maintain good health. I feel a lot better and my skin problems are also cured by using ghee.
Thanks for sharing this easy method to making ghee.
You are welcome, Ankit!
Hello and thank you. Can I use ghee in place of butter in my baking (mainly cakes) and if so do I use the same amount? It seems like it would make my cakes and frosting far yummier. Cherrs, Joyce
Hi Joyce,
yes, you can! You use the same amount.
YES!!!! Fabulous! Ghee Nation….. ;-)))
Dear Heidi-the way I prefer to separate ghee is after you’ve browned it, pour contents into tall plastic container (or “French working glass”) then refrigerate. Let set. Turn it upside down & use the milk solids to flavor whatever you like-scrambled eggs or dip bread into it, but when you use cheesecloth, you’re throwing all that brown milky goodness away yes> Love your blog. ty!
Hi Maureen, Don’t worry, I keep the caramlized milk solids from the strainer! They are delicious, I agree!