Jun. 28, 2021
Cooking In Season
Salad Meals to Beat the Heat
In this recipe round up, I have gathered my best and most delicious summer salad meal recipes in one post, for days when it’s too hot to cook!

I’ve finally recovered from my week in the kitchen with 37 kids over Spring Break. We had so much fun! I’m stopping now, because I had you at 37 kids, didn’t I? Yes, but they were spaced over two camps (younger kids in the mornings, older ones in the afternoon), not 37 kids all at once.
However, it may as well have been all at once because by Friday I felt like I had been playing dodge ball with 37 highly energetic school children who were also equipped with flour, eggs, and tomato sauce. If the best measure of fun times is how long it takes a girl to recover, then boy did we EVER HAVE FUN!! 🙂 Dough was kneaded, knives were wielded, tummies were filled with yummy food, and smiles smiles smiles all around.

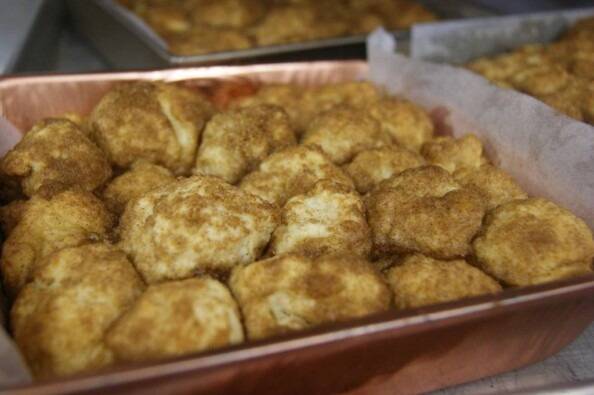
One of my favourite recipes from my Spring Break cooking camp, and one that I never take off the menu, is Monkey Bread. It’s like doughnut holes made out of biscuit dough, rolled in cinnamon sugar, and piled together in a buttered pan for baking. The dough is easy to make (and un-wreckable no matter how much it is kneaded and played with), and the finished treats taste delicious to all members of the family. Perfect for little monkeys to make, to knead, to cut and dip, and to pull apart with their fingers after it has finished baking.
Really, Monkey Bread a perfect recipe for kids who like to cook. Older children can make Monkey Bread entirely on their own, and younger children can easily make this with some help from adults. Best of all, little ones can knead this dough as much as they like without making the dough tough. And the dough can be divvied up among family members to each bake their own little batch in mini-loaf pans or muffin tins.
(Kids, I’ve noticed, like to have their own.)
For all the reasons above, Monkey Bread my go-to recipe to teach in classrooms, schools, and cooking camps.

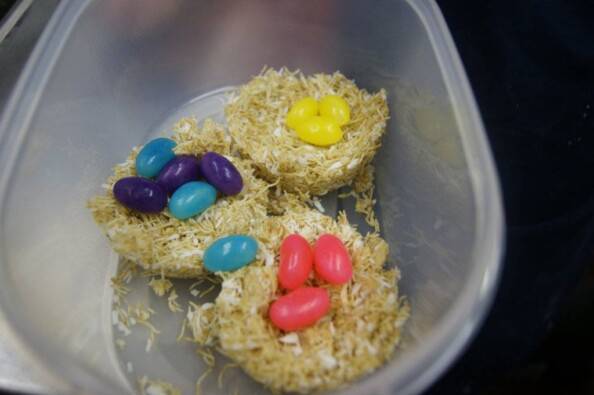
I was originally going to start and end this post with Monkey Bread, but I felt we needed a little specific holiday flare with Easter coming up. Also, the kids in the camp had a super fun time making these Bird’s Nest Cookies and were thrilled with how they looked. And, to be quite honest, they were the easiest recipe we made all week. No bake, no fuss, and lots of hands-on action for the kids.
So, I’m adding the Bird’s Nest recipe to this post. Two for the price of one!
QUICK MONKEY BREAD
Serves 8.
A perfect fun recipe for kids of all ages. The dough is easy to work with, doesn’t get tough even with lots of handling, and can be divided up to make individual portions.
Dough Ingredients
2 ¾ cup all purpose flour
3 Tb white sugar
2 tsp baking powder
½ tsp baking soda
½ tsp salt
•
1¼ cups buttermilk
½ cup butter, melted
Coating Ingredients
¾ cup packed light brown sugar
¼ cup white sugar
1 Tablespoon cinnamon
½ cup melted butter (keep the butter separate!)
instructions
Adjust oven rack to middle position in the oven and preheat the oven to 350°F. Generously butter an 8×8-inch pan and set aside.
Dough:
In a large bowl, mix together the flour, white sugar, baking powder, baking soda, and salt.
In a separate bowl, mix together the buttermilk and melted butter. Stir these wet ingredients into the bowl with the flour mixture. Mix until dough comes together and forms a ball.
Sprinkle a little bit of flour on a counter. Turn the dough out onto the floured counter. Sprinkle a little more flour on the top of the dough. Knead the dough for about 5 minutes, until smooth.
Coating:
Measure the brown sugar, white sugar, and cinnamon in a small bowl. Mix with a fork or your fingers until well-combined. Have the melted butter ready in a separate small bowl. Set both bowls aside.
Assembly:
Sprinkle some flour on the counter in front of you. Use a rolling pin or your hands to roll the dough out into a large rectangle or oval. Use a butter knife or scraper to cut the dough into donut-hole-sized pieces (about two bites each). It doesn’t really matter what size the ball are, as long as they are all the same size, so they cook evenly.
Working with one dough ball at a time, dip balls in melted butter, allowing extra butter to drip back into bowl. Roll the buttered balls in the cinnamon-brown sugar mixture, then layer balls in the prepared pan. Make sure you stagger the seams (as if you were layer bricks). Continue until all the dough is used up.
Place in the oven and bake until top is deep brown and caramel begins to bubble around edges, 30 to 35 minutes. Cool in pan for 5 to 10 minutes, then turn upside down onto a platter and allow to cool slightly, about 10 minutes.
The marshmallow (chocolate-free) version of Bird’s Nest Cookies.
BIRD’S NEST COOKIES
Makes 12-15 mini nests
These fun no-bake treats look exactly like little bird’s nests. They can be filled with jelly beans or candy-coated chocolate eggs.
NOTE: to make a chocolate-free version, use one bag of mini marshmallows and melt with 2 tablespoons of butter. When melted, mix with crumbled shredded wheat and stir quickly to mix. Form as for the chocolate version. You must work FAST with these ones because they harden quickly!
ingredients
1 cup shredded unsweetened coconut (optional)
6 “loaves” of Shredded Wheat (the old-school kind, not the mini-wheats)
2 cups milk or dark chocolate chips or 300 g chocolate bar, chopped (OR marshmallows – see NOTE above)
Cooking spray or oil
Muffin tin
Cadbury mini eggs or jelly beans (for eggs)
instructions
Spray muffin tin with cooking spray or rub the insides of each cup generously with oil.
Put shredded wheat into a large bowl and crunch them up into little tiny pieces.
Add 1 cup of coconut to the shredded wheat, toss until mixed well.
Use a double boiler (or a heat-safe bowl set over pot of bowling water) or the microwave to melt the chocolate
Carefully, pour melted chocolate over wheat mixture. Use a spoon to mix until the chocolate evenly coats the shredded wheat and the coconut.
While the chocolate is still soft, form the nests in the muffin tins. Press firmly to make sure the nests will hold their shape after they are removed. Press some of the mixture up the sides of the muffin cups, and make sure to make a little center dip to hold your eggs. You can do this with your fingers or by pressing in the center of the nests with a greased soup spoon.
Place in the fridge to harden. Use a knife to “pop” out the nest after it’s hardened. Fill each nest with a few eggs (either the Mini Eggs, or the jelly beans, or a mixture). Serve! These last several days, well-covered, at room temperature
Jun. 28, 2021
In this recipe round up, I have gathered my best and most delicious summer salad meal recipes in one post, for days when it’s too hot to cook!
Oct. 25, 2020
Quince have a wonderful flavour, but an almost impossibly hard texture. Read on for a quick kitchen tip that makes quince easy to peel and cut!
Sep. 27, 2020
Pumpkin spices scones are a perfect fall treat; not-too-sweet, fragrant with spices, with a full complement of rich pumpkin flavour.
There ought to be a medal for teaching that many kids!! I bet it was fun. Do you think I could pass for a 10 year old and take the class next year? 🙂
Hi Amy, I’ll take your lovely comment as medal enough for me! thanks very much. Next year, for sure, I’ll sneak you in 🙂
Hi, Heidi, am wondering if you will be doing kids classes in the summer, I am interested in signing up my 10 year old grandson.
Hi Sheila, Not likely this year, but it’s still a maybe. It will depend on my work schedule and the schedule at SMUS, where I teach the camps.